
.png)
Create Rackspace Admin Account
Thank you for working with us for your migration from Rackspace to Google Workspace, we need some information from you to make the migration seamless, and one of them is an Administrator account in Rackspace.
We will use this account to view data/settings in your Rackspace (e.g users, groups, members, aliases) so that we can create the same users, groups, members and aliases in Google Workspace.
You would already have an Administrator account with Rackspace, but if you do not feel comfortable sharing it with us, then you can create a dedicated administrator account for us and remove this account once we are done with the migration.
So how do you create an administrator account in Rackspace?
To create a Rackspace administrator account, login to your Rackspace control panel (cp.rackspace.com) with your administrator account, go to Administrators under my account and create an admin account.
You will find below step by step instructions helpful to create a Rackspace administrator account.
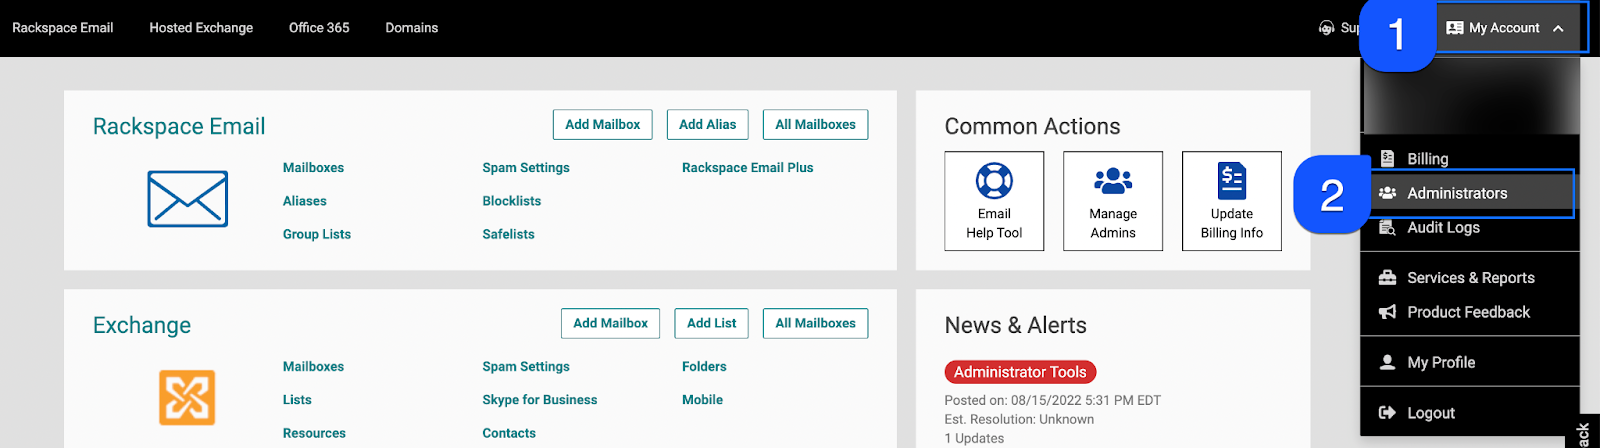
1. Login to your Rackspace control panel with your administrator username and password

2. Click on the Administrators link under my account
3. To create a new Rackspace Administrator, click on Add Admin under Administrators

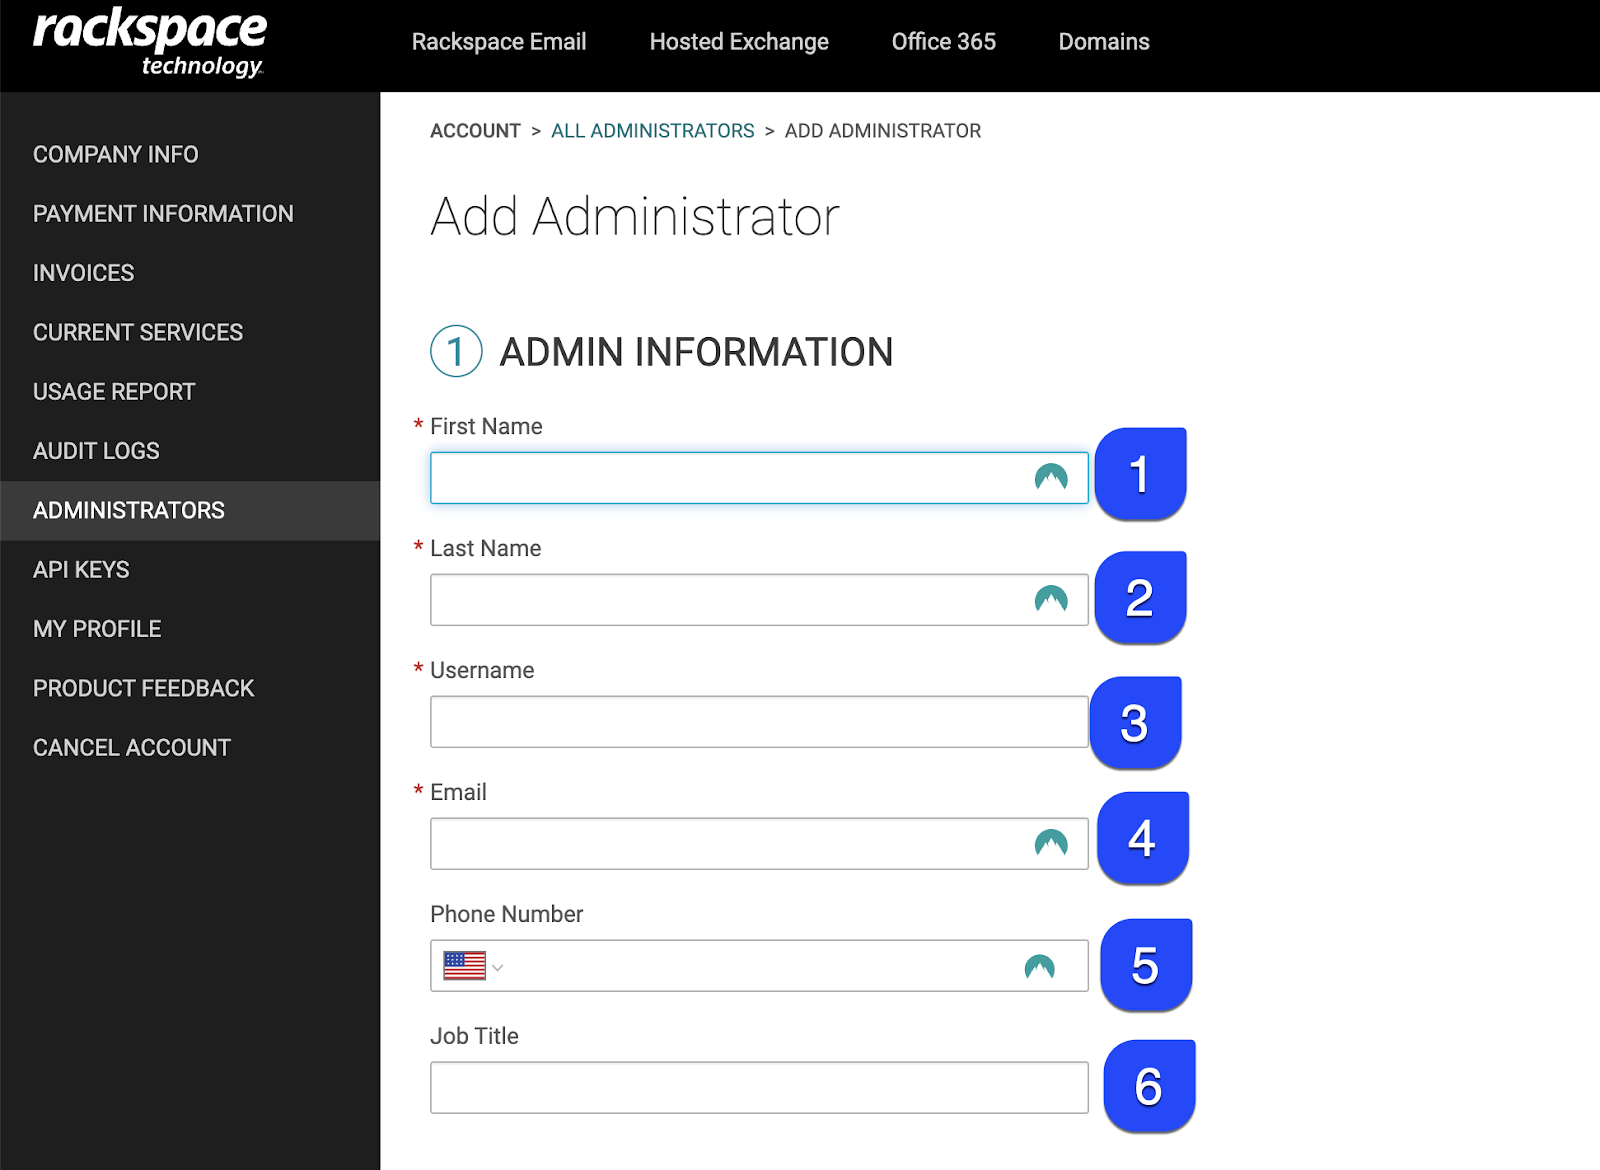
4. Add Admin Information for the new admin
– Enter Googally for the first name
– Enter Migration for the last name
– Enter googally-yourcompanyname for the username
– Enter for migrations@googally.com the email address
– Leave the phone number and job title empty
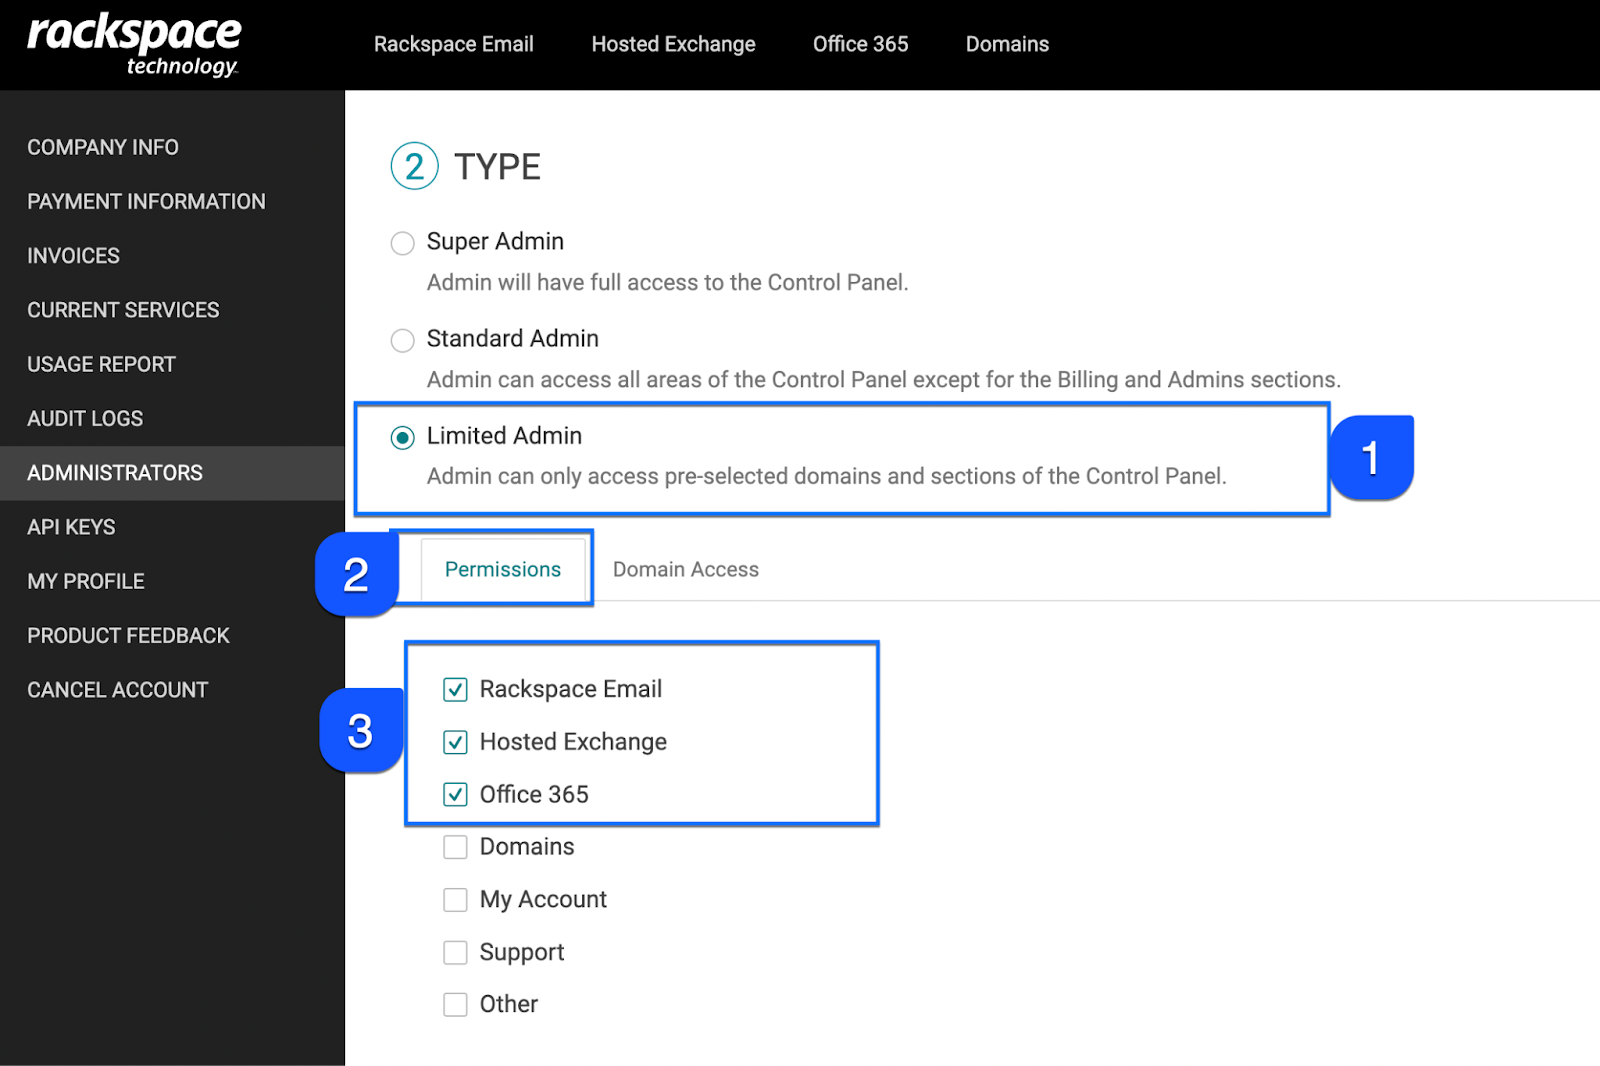
5. Under Administrator type, select limited admin, then click on Permissions and check the email plans you have with Rackspace (e.g if you only use Rackspace Email, then only select it, but if you use Rackspace Email, Hosted Exchange and Office 365, then select all of these three)
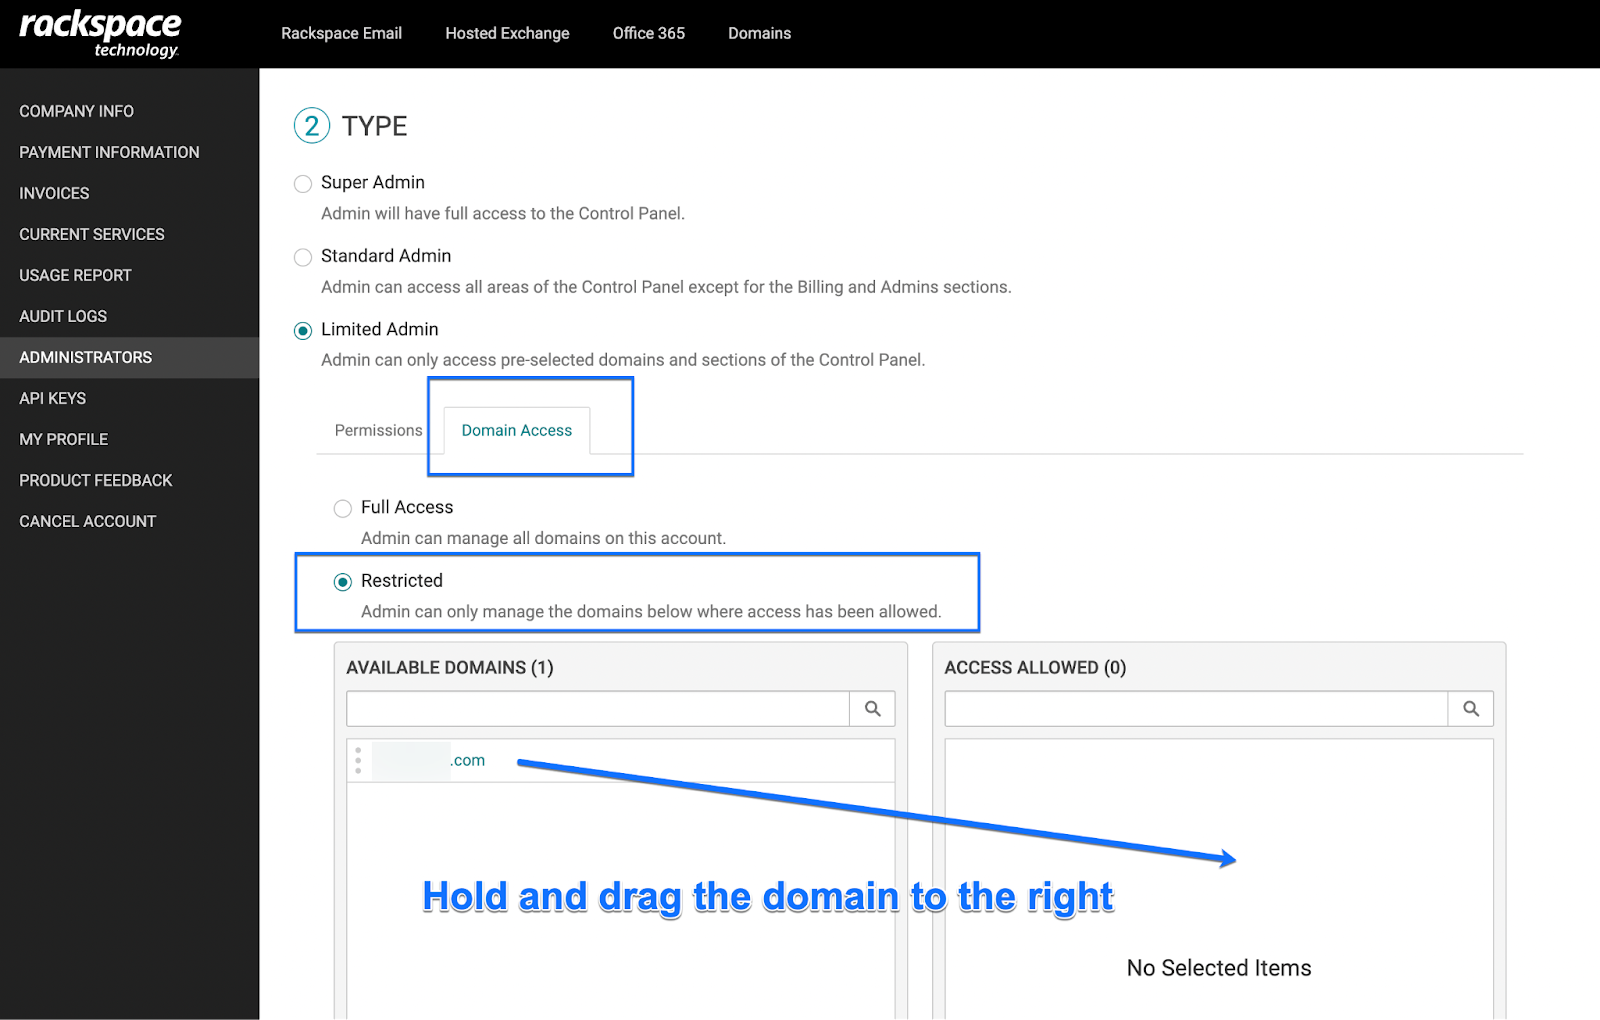
6. Now click on the Domain Access tab, hold and drag the domain name from Available domains to Access allowed, please do this for all the domains from which you want us to migrate emails to Google Workspace.
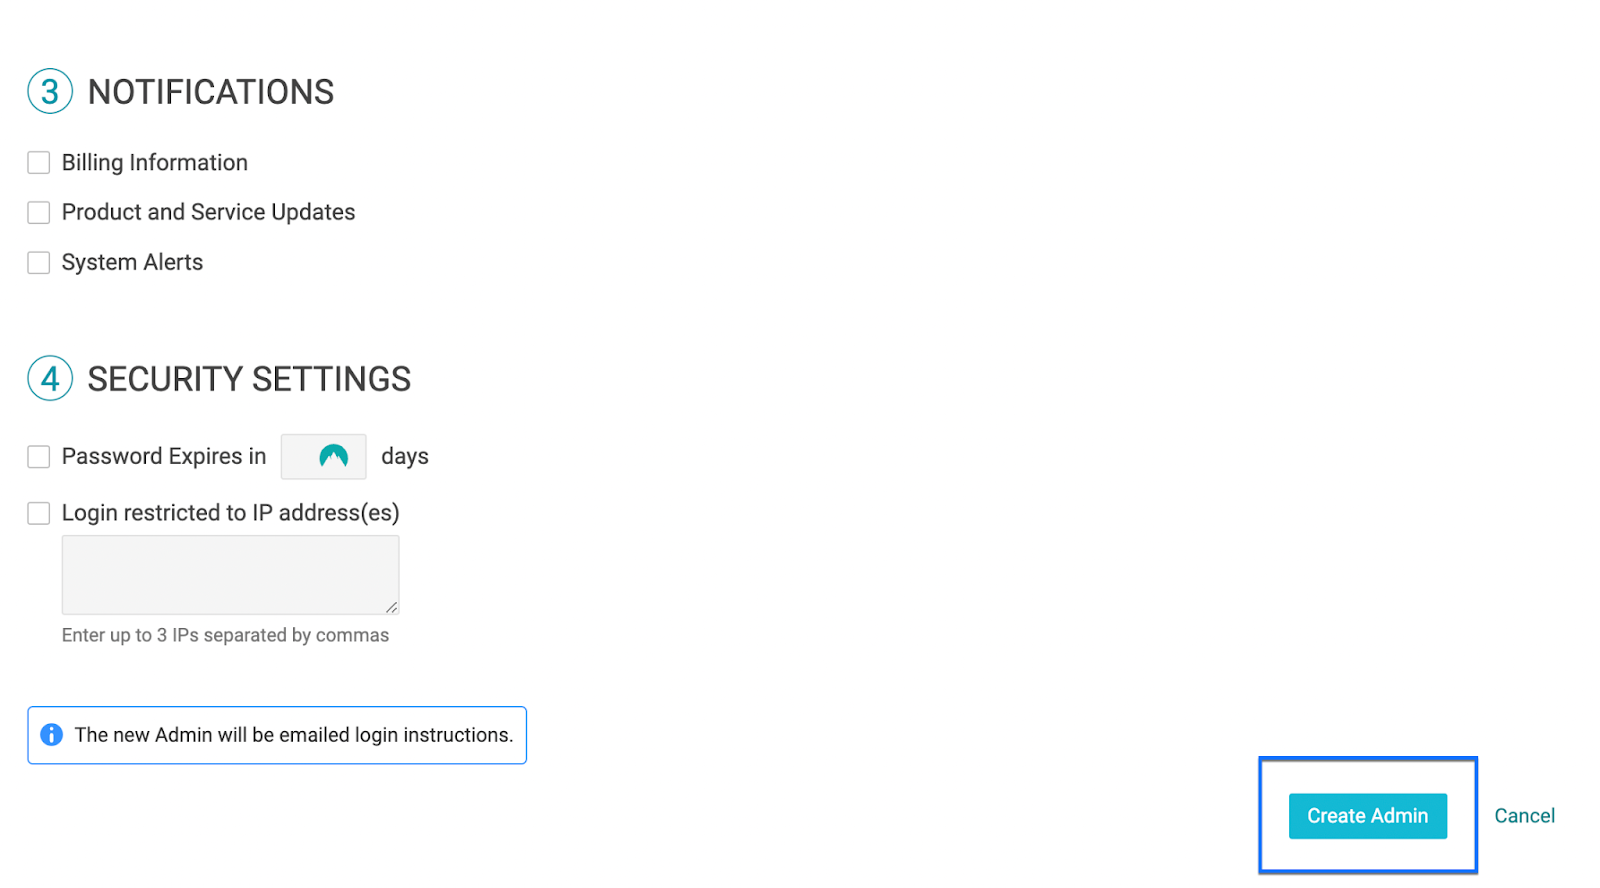
7. Now, you should see the domains under Access allowed like the following.

8. Leave everything as it is here and click on Create Admin.
Thank you, you have now created a dedicated Rackspace Administrator account for us, we should have got an email from Rackspace by now to setup the account password, we’ll let you know if we need any help here.
Related Posts
Explore Tips and Guides! Discover expert insights and practical guides for optimizing your Google Workspace experience with our informative resources.
.png)
.png)
.png)
.png)
.png)
.png)


.png)
.png)

.png)


.png)
.png)


.png)


