

How to create Google Workspace MX Records
In this write-up you will learn how to create Google Workspace MX records for your domain name so that you can receive your business emails using the Google Workspace email servers.
When you send an envelope or a package via USPS, the service needs the recipient’s address to deliver it. Similarly, when someone sends an email to marketing@yourdomain.com, the Internet routing services look at the MX records of the domain associated with your email to know which mail server the email must go to.
MX stands for “mail exchange”. MX records point to the mail server that is currently being used to manage your incoming email.
To be able to use Google Workspace as your primary email service, you need to point the MX records to the Google email servers.
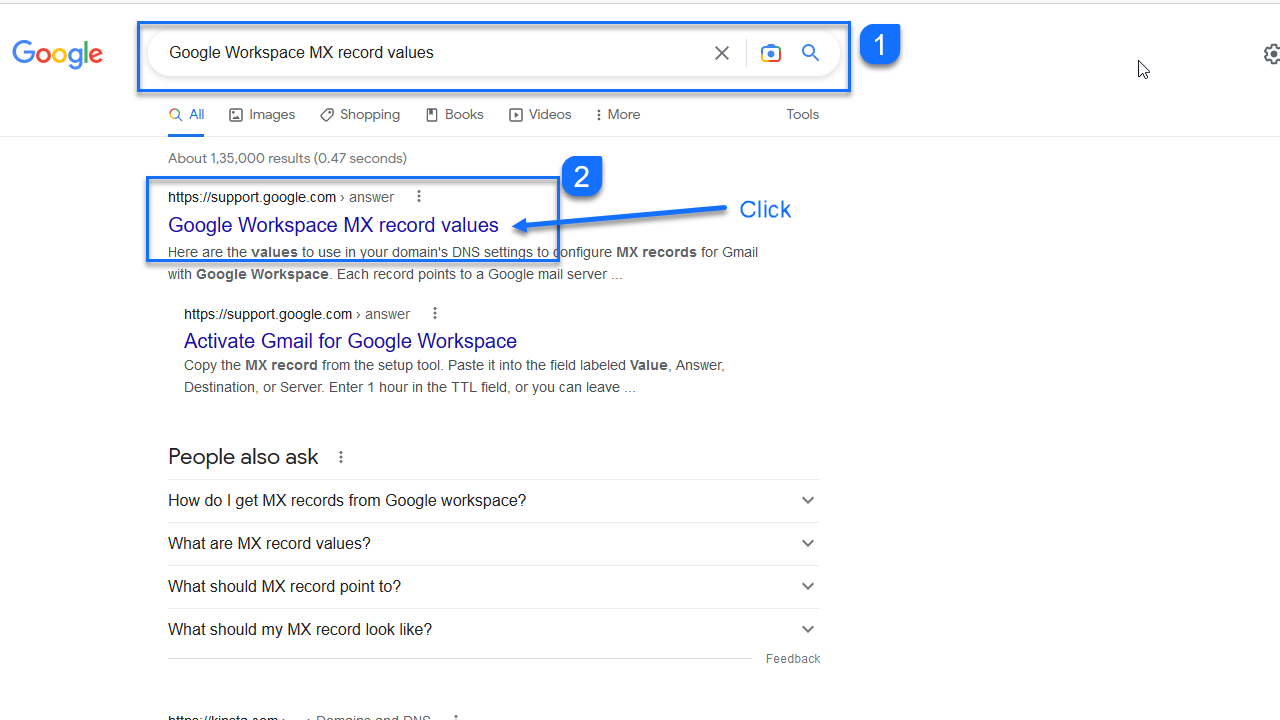
How to get MX records for Google Workspace?
You can simply search for “Google Workspace MX records values” on Google.
If you don’t feel like searching, these are the Google Workspace MX record values that you need to create at your DNS provider:
Google Workspace MX records table
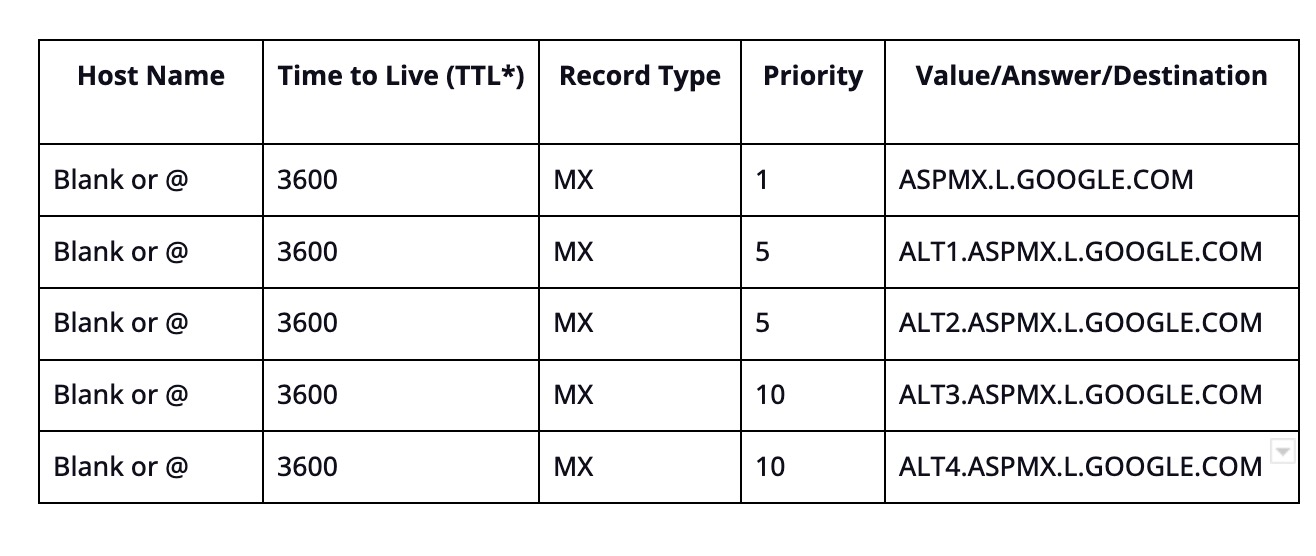
As you can see, there are multiple MX record entries. You will need to add all these entries when you create MX records with your DNS provider.
Where do you create or modify the Google Workspace MX records?
You create or modify your MX records where you have pointed your nameservers.the
What are nameservers? They decide who has the authority to reply to DNS queries for your domain, which in plain terms means, which IP addresses to go to when someone types yourdomain.com in their browser.
The nameservers can be from your domain registrar where you have purchased your domain, or they can be from your web hosting provider where you are hosting your website. If you have purchased your domain and hosting from the same website, for example GoDaddy, then this is where you will be making DNS changes and entering Google Workspace MX records.
We would recommend you read our post about How to find where your nameservers point.
Every DNS provider allows you to manage your email services by setting up MX records. For example, right now if you’re using Rackspace or GoDaddy to manage your emails, your MX records must be pointing to the Rackspace or GoDaddy email servers.
To be able to use the Google Workspace email service, you need to point these MX records to Google Workspace servers.
How do you find your existing MX records?
Every DNS provider may have a different interface to set up or change MX records. But every DNS provider has MX record entries in the DNS section. This is where you will be replacing the current MX records with Google Workspace MX entries.
As a reference, I’m going to use GoDaddy to illustrate how you can change or create your Google Workspace MX records.
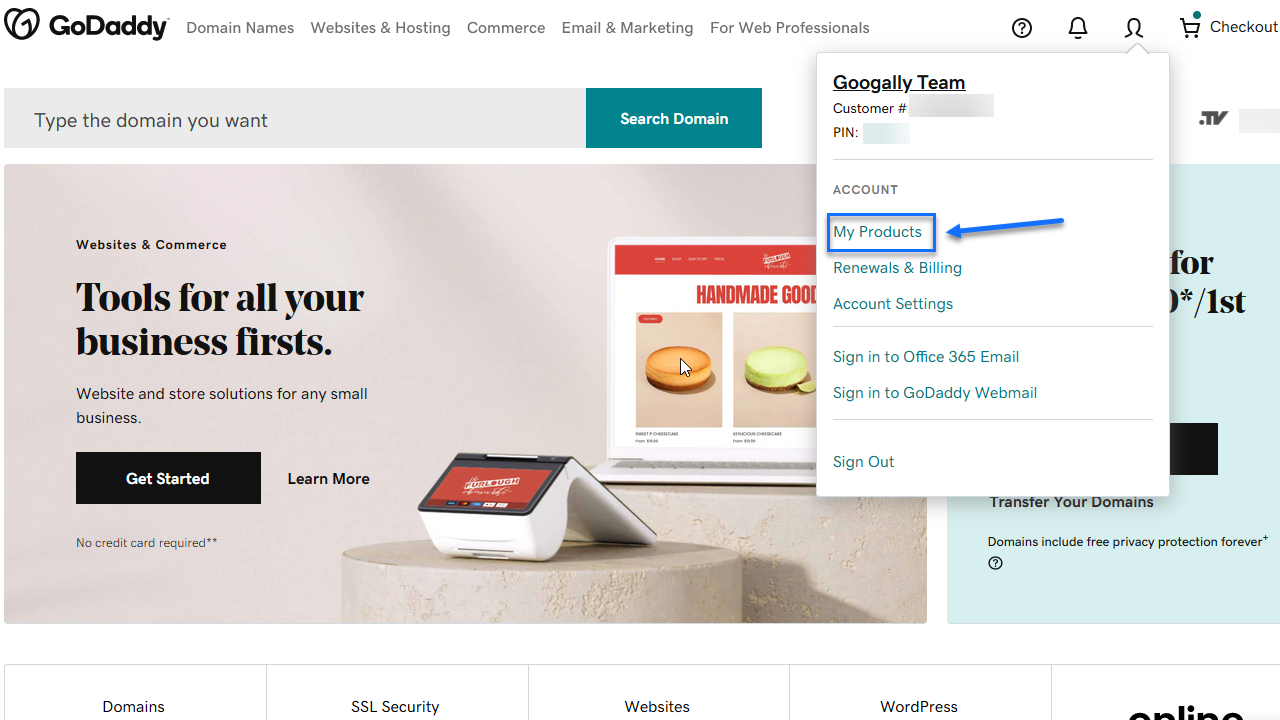
1. Log into your GoDaddy account.
2. Go to the “My Products” section in case you’re using multiple GoDaddy products such as web hosting as well as domain management.
3. Scroll down to the domain name for which you want to change the MX records and you will see the DNS (Domain Name System) link adjacent to it.
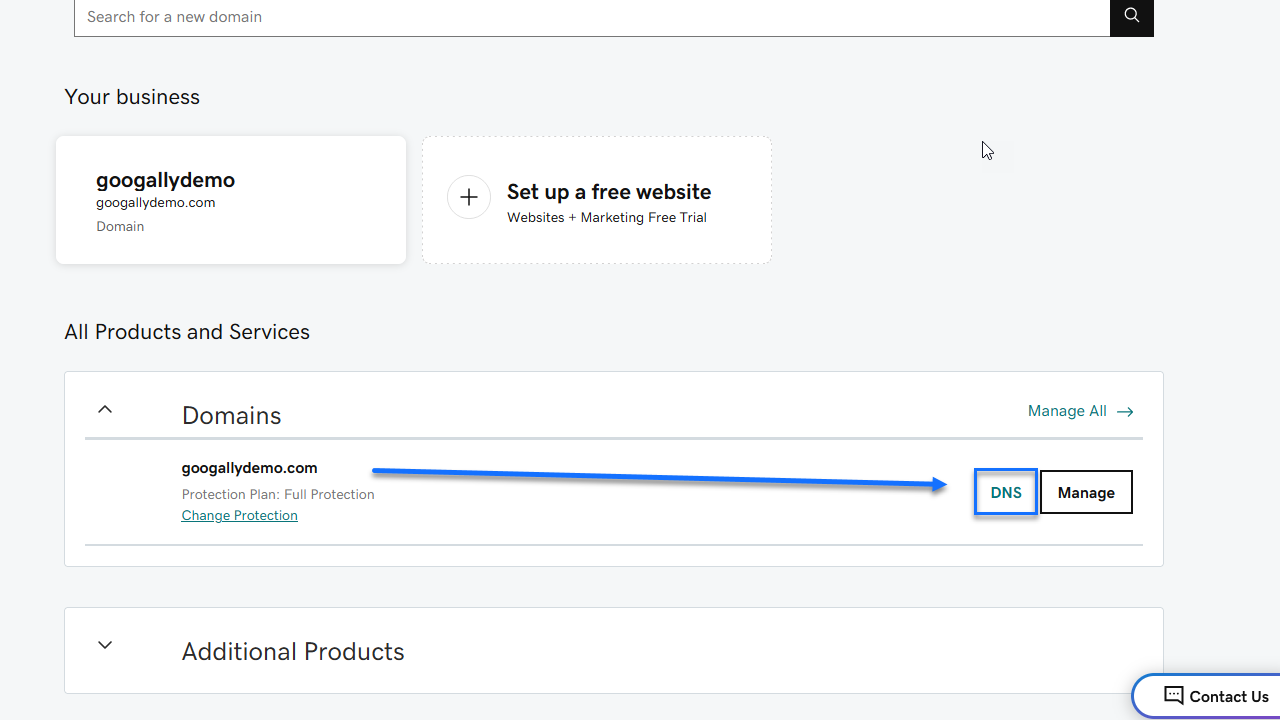
There may be many entries in the DNS records section and you may have to change your view to be able to see your MX records entries.
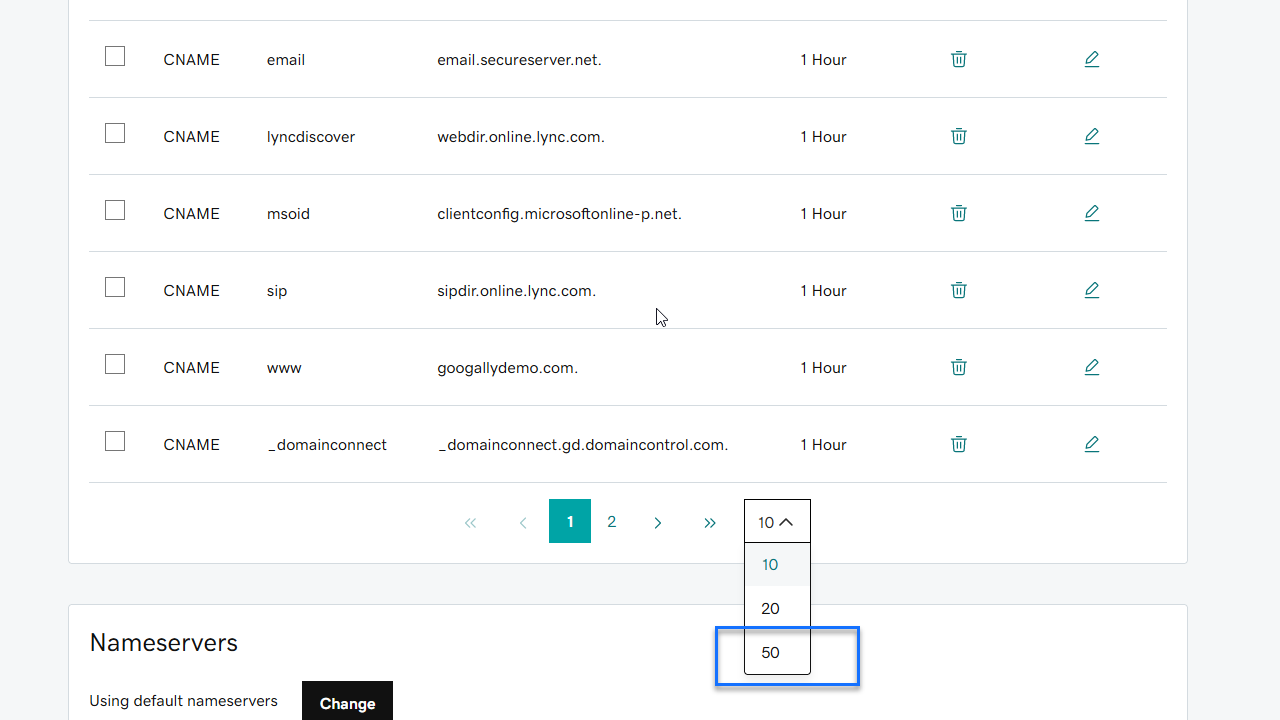
Now you should be able to see your current MX record settings.
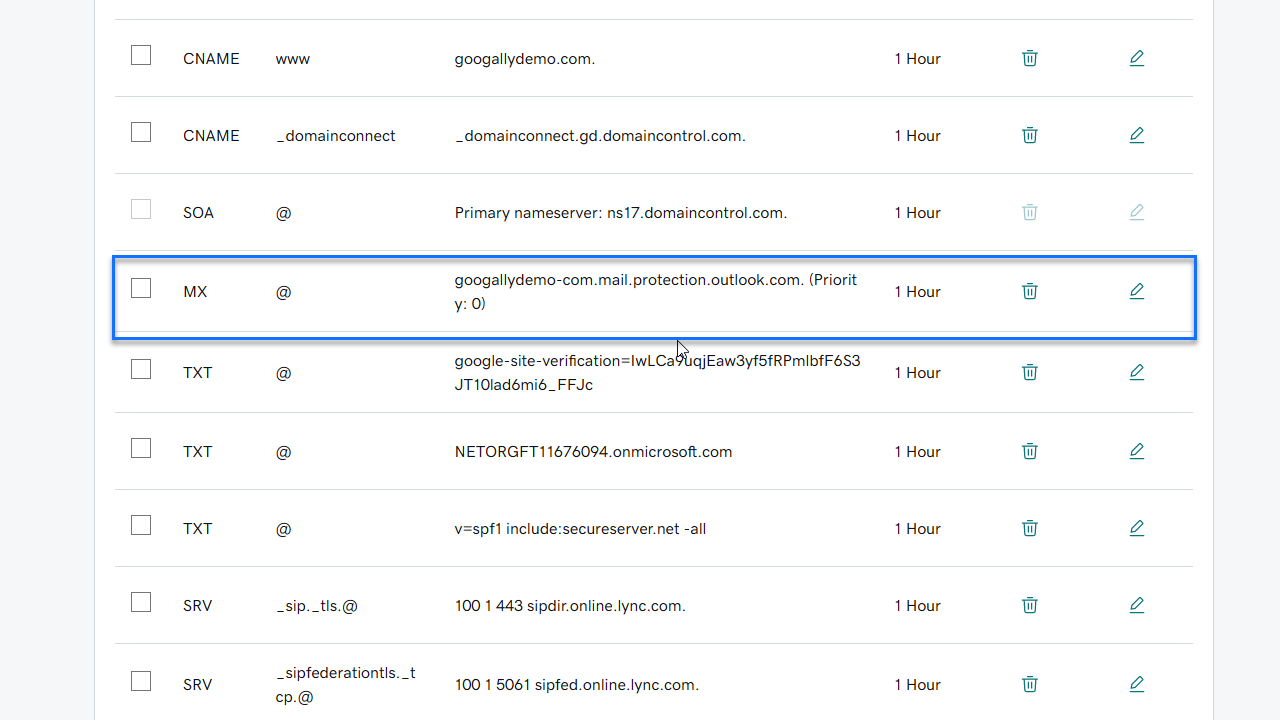
Just to be on safer side, take a screenshot of your current MX records entries and save it somewhere so that in case there is some problem you can quickly revert to your original settings.
Note that there is a dot after the MX record address.

Some DNS providers/web hosts require you to enter a dot after the MX record address, and some don’t. As you can see, GoDaddy requires you to enter a dot after the MX record address. ASPMX.L.GOOGLE.COM becomes ASPMX.L.GOOGLE.COM. (a dot in the end).
There are both “delete” and “modify” icons adjacent to your current MX record entries. Instead of deleting the entry, click the pencil icon to edit/replace the current record because if you delete it, your email can bounce during deletion and addition of MX records.
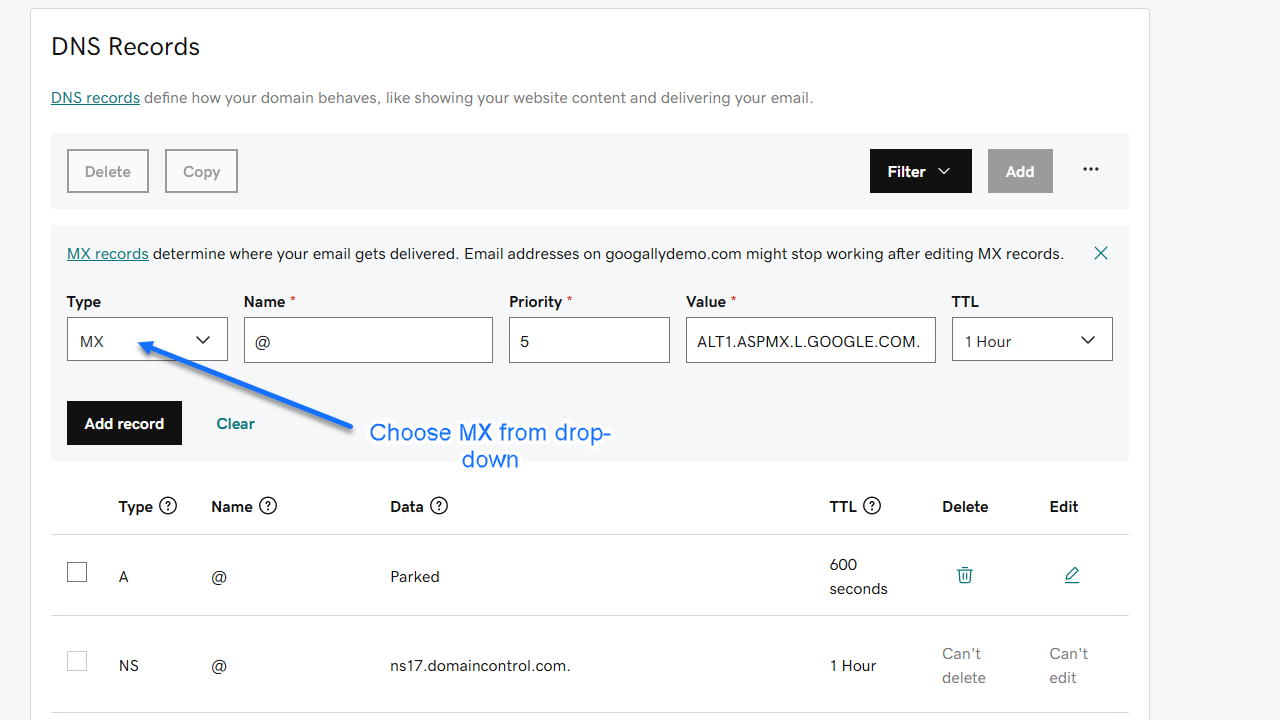
When you click the “edit” icon you are presented with some drop-down options and text fields to enter details. Below I have replaced the current entries with the first Google Workspace MX record.

1. In the Type option, you choose “MX.
2. For Name, you enter “@”.
Some DNS providers may take the domain name (for example, yourdomain.com) instead of “@”. Since GoDaddy accepts “@”, here I’m putting “@”.
3. For Priority, you enter 1.
4. For priority values, please refer to the “Google Workspace MX records table” above.
Different MX record destinations have different priorities. It is just a way of telling which mail server should be tried first while attempting to deliver email.
For example, ASPMX.L.GOOGLE.COM having Priority as 1 and ALT1.ASPMX.L.GOOGLE.COM having Priority as 5 means when email is being delivered, first ASPMX.L.GOOGLE.COM must be attempted, but if it is too busy, then ALT1.ASPMX.L.GOOGLE.COM should be tried.
For Value, you enter “ASPMX.L.GOOGLE.COM.”
Please note that there is a dot at the end of the address. Again, some DNS providers require you to add a dot at the end, and some don’t.
For TTL (Time to live) you enter 1 hour (3600 seconds).
Click “Save” to save the entries.
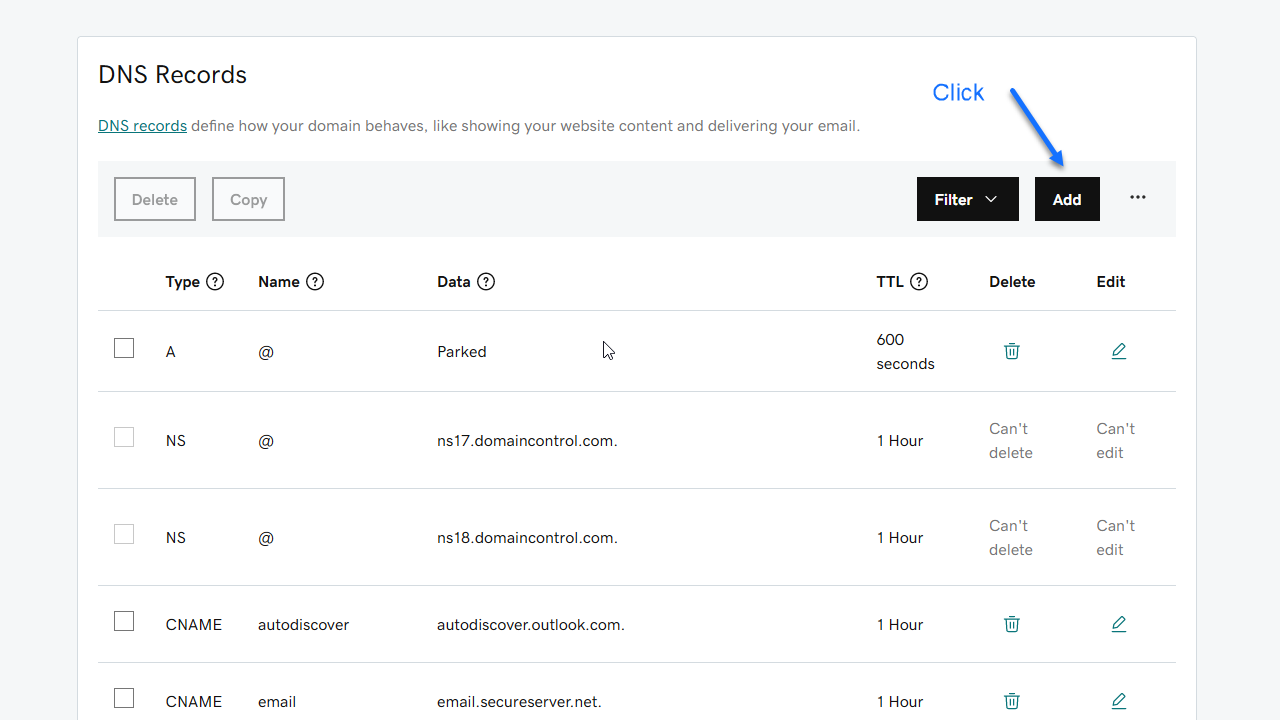
To enter the next MX record, you click Add.
Following the above steps, you can add the next Google Workspace MX record.
Make sure that in the “Type” drop-down you select “MX”.
For Priority, this time you enter 5, as recommended in the “Google Workspace MX records table”.
Similarly, you can add the remaining three entries in the “Google Workspace MX records table”
Once you have added all the Google Workspace MX records, this is how all the entries should look:

It may take a few minutes depending on your DNS provider before the new MX record entries take effect.
Once your domain’s MX records are propagated and pointing to the Google Workspace email servers, your new emails will land in Google Workspace Gmail.
How do you know that your MX record changes have taken effect?
You can also go to https://mxtoolbox.com/ and enter your domain name.
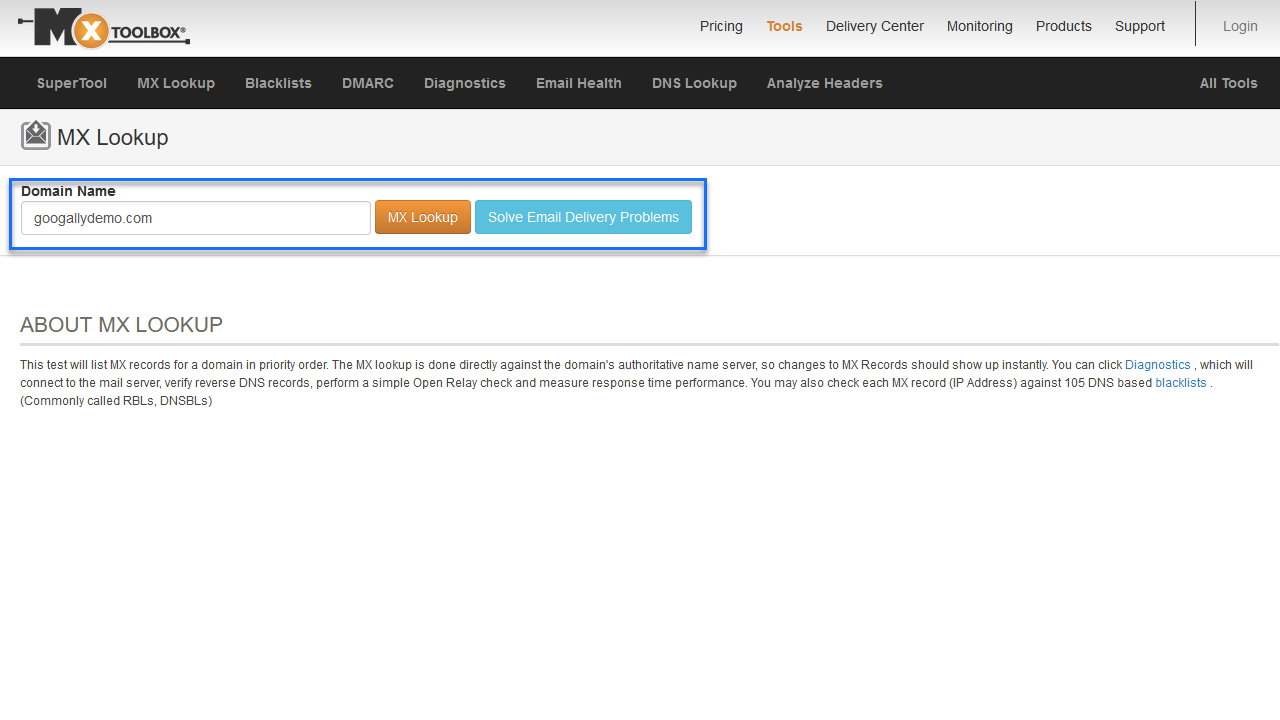
The proceeding screen will show if your domain’s MX records are pointing to the Google email servers. If that’s the case, you’re all set to receive emails to your Google Workspace mailboxes.

Once your domain’s MX records have propagated and are pointing to the Google Workspace email servers, your new emails will land in Google Workspace email.
Related Posts
Explore Tips and Guides! Discover expert insights and practical guides for optimizing your Google Workspace experience with our informative resources.
.png)
.png)
.png)
.png)


.png)
.png)

.png)


.png)
.png)


.png)


.png)


