

How to create Google Workspace SPF records
SPF stands for Sender Policy Framework. It is an email authentication method which is used to prevent spammers from sending emails on behalf of your domain name.
Creating SPF records also reduces the instances of your email being marked as spam by the recipient’s email service.
You can add SPF records to your Domain Name System (DNS). This is a public list of senders that are authorized to send email on behalf of your domain.
What are the advantages of creating SPF records?
Since your email becomes trustworthy, it reaches a greater number of inboxes. Although the chances of your emails being marked as spam cannot be completely eliminated, the instances can be reduced to a great extent.
If you’re using Google Workspace to manage your email, you can add the Google Workspace SPF records to your DNS so that whichever email server receives your email, it knows that you have authorized Google Workspace to send emails on behalf of your domain.
What are the best practices for adding multiple SPF records?
Only one SPF record should exist in your DNS, but what if you want to authorize multiple services to send emails on behalf of your domain?
In that case, you can simply combine the SPF record values into one.
Let say If you use mailchimp to send your marketing emails, and also want to add SPF records from MailChimp.com aside from Google Workspace, how would you then create SPF records?
We already know the SPF records for Google Workspace:
v=spf1 include:_spf.google.com ~all
By googling you can also find the SPF records for MailChimp:
v=spf1 include:spf.mandrillapp.com ?all
You need to combine these two entries in the following manner:
v=spf1 include:_spf.google.com include:spf.mandrillapp.com ~all
Google Workspace SPF record set up
In this example I am illustrating how to add the Google Workspace SPF records to the GoDaddy DNS.
Different DNS providers may have different paths to reach the DNS management section but eventually, when you add the SPF records, you will be creating TXT records in the DNS section with the value of Google Workspace SPF.
First, you need to look up the values for Google Workspace SPF records.
Simply search for the latest Google Workspace SPF records on Google.
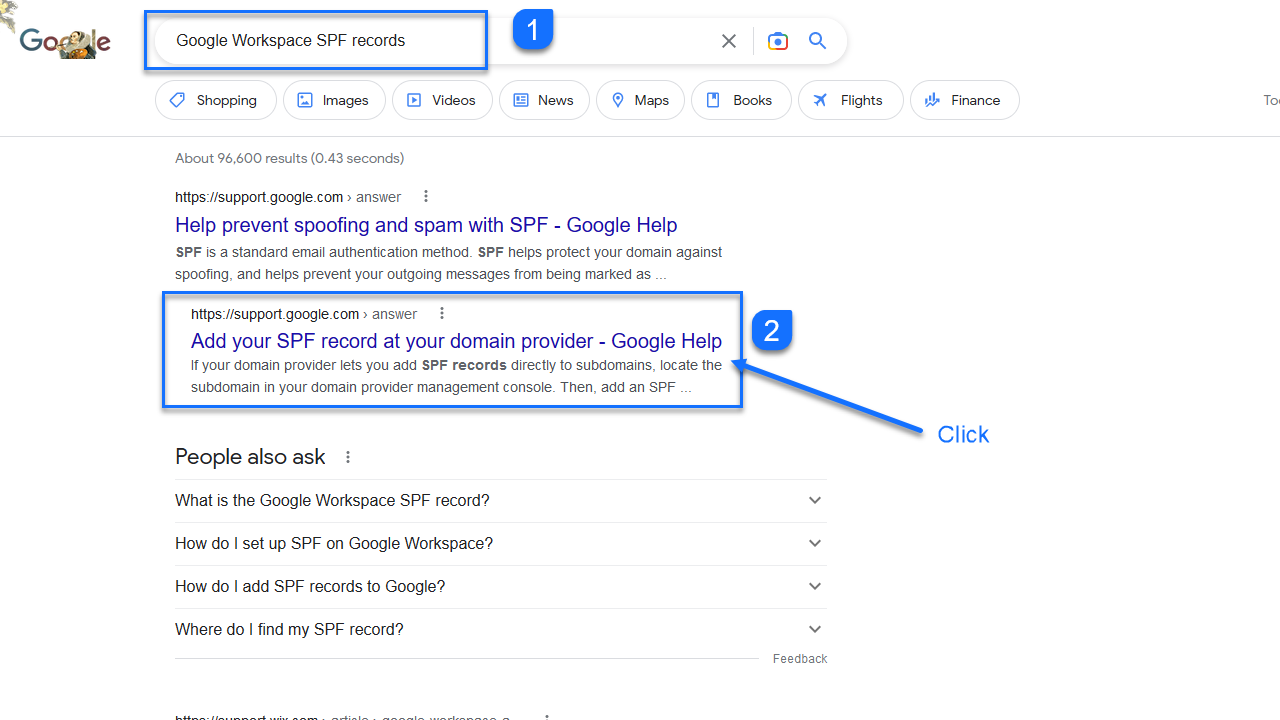
Google suggests that you add this value for your SPF records
v=spf1 include:_spf.google.com ~all
The value has different parts
- v=spf1 means that this is an SPF record of version 1. For the time being, only version 1 exists.
- include:_spf.google.com means include this particular domain in the SPF setup of your domain.
- ~all means that unlisted emails will be marked as insecure or spam but still accepted. Nonetheless, all valid emails are sent from the included SPF domain, google.com, in this case.
Keep a note of this information because you will be entering these values when creating your Google Workspace SPF records.
Modifying DNS information to create Google Workspace SPF records
As mentioned above, for demonstration purposes, I’m using GoDaddy as a DNS manager. If you’re using another DNS manager the interface may be different, but eventually, you will need to navigate to your DNS management section
Different DNS providers may have different paths to reaching the DNS management section but eventually, when you add the SPF records, you will be adding them under the DNS section.
Listed below are the steps to access your domain-specific DNS section in GoDaddy:
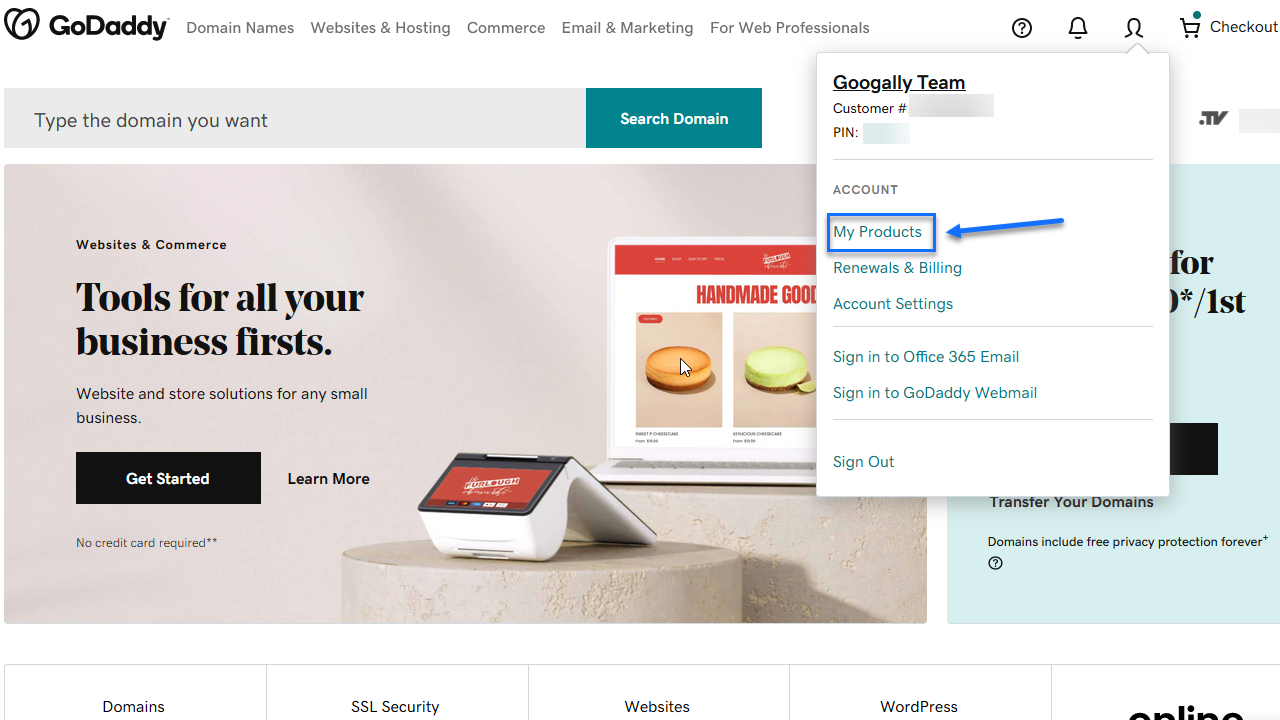
1. Log into your GoDaddy account and go to the “My Products” section.
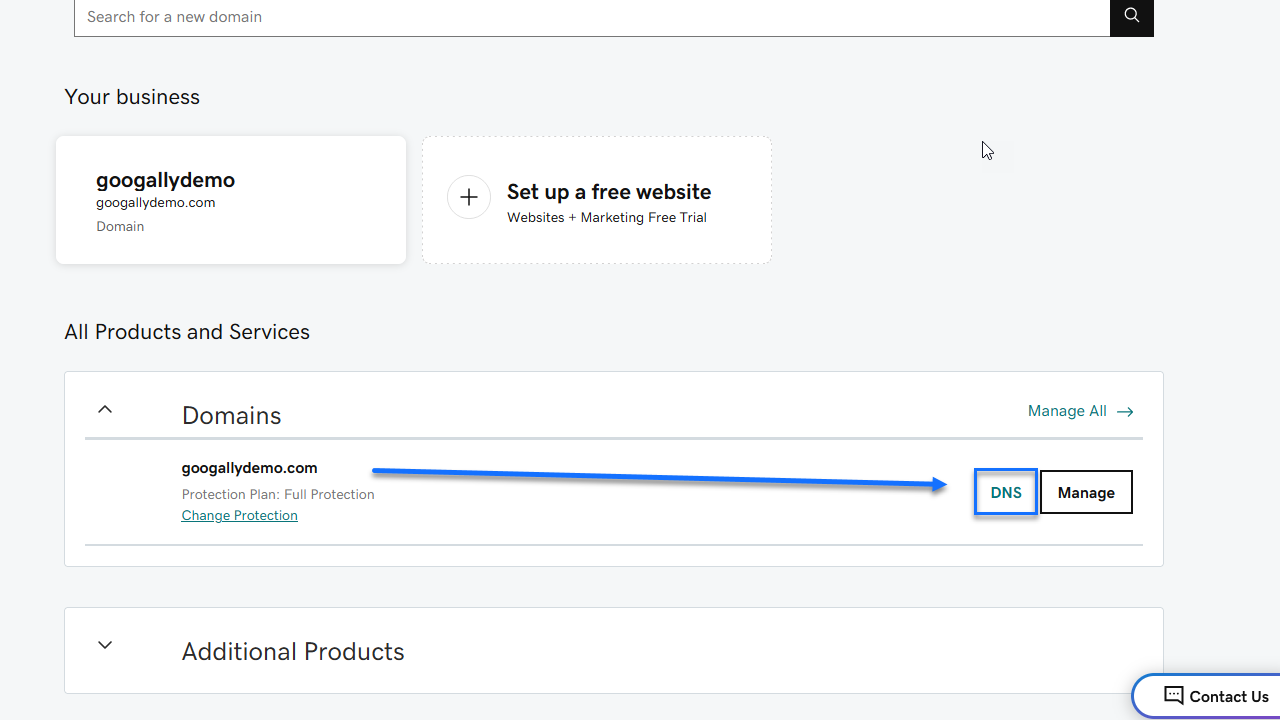
2. Scroll down to the domain name for which you want to create the Google Workspace SPF records, and you will see the DNS (Domain Name System) link adjacent to it.
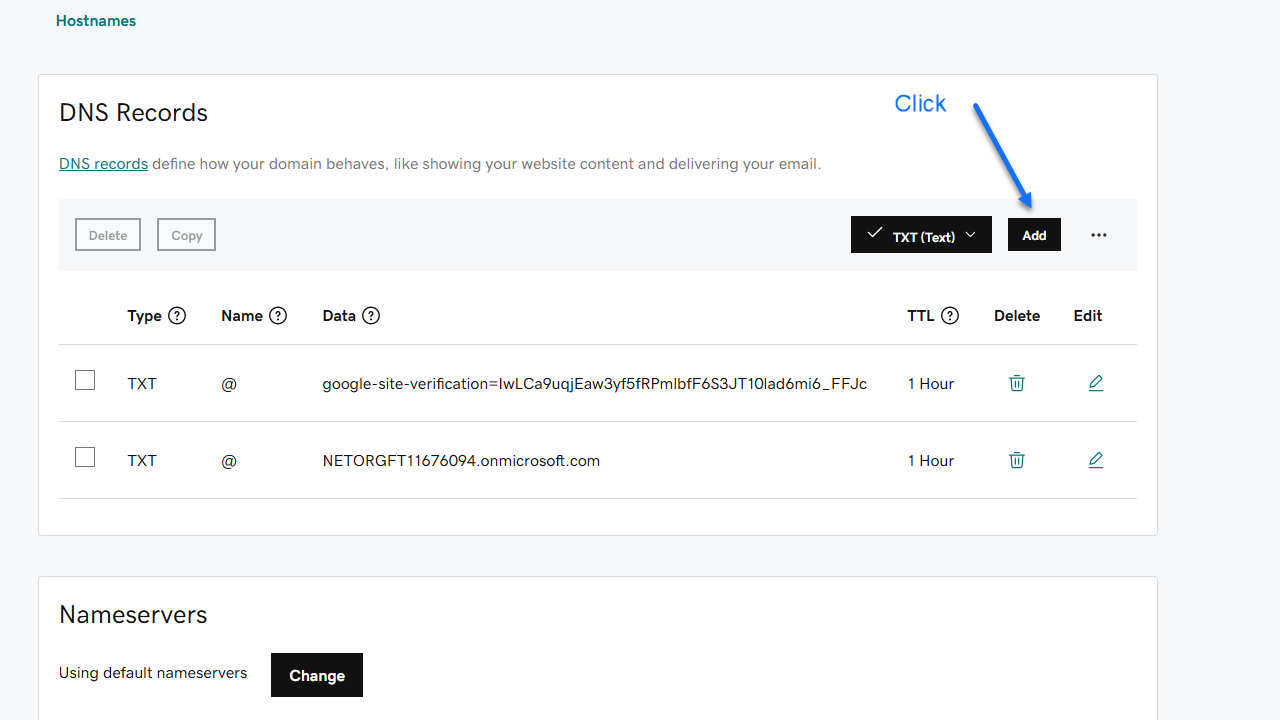
You first need to check if an SPF entry already exists in your DNS section.
As SPF is a TXT record, you can filter the information on DNS entry types to TXT records.
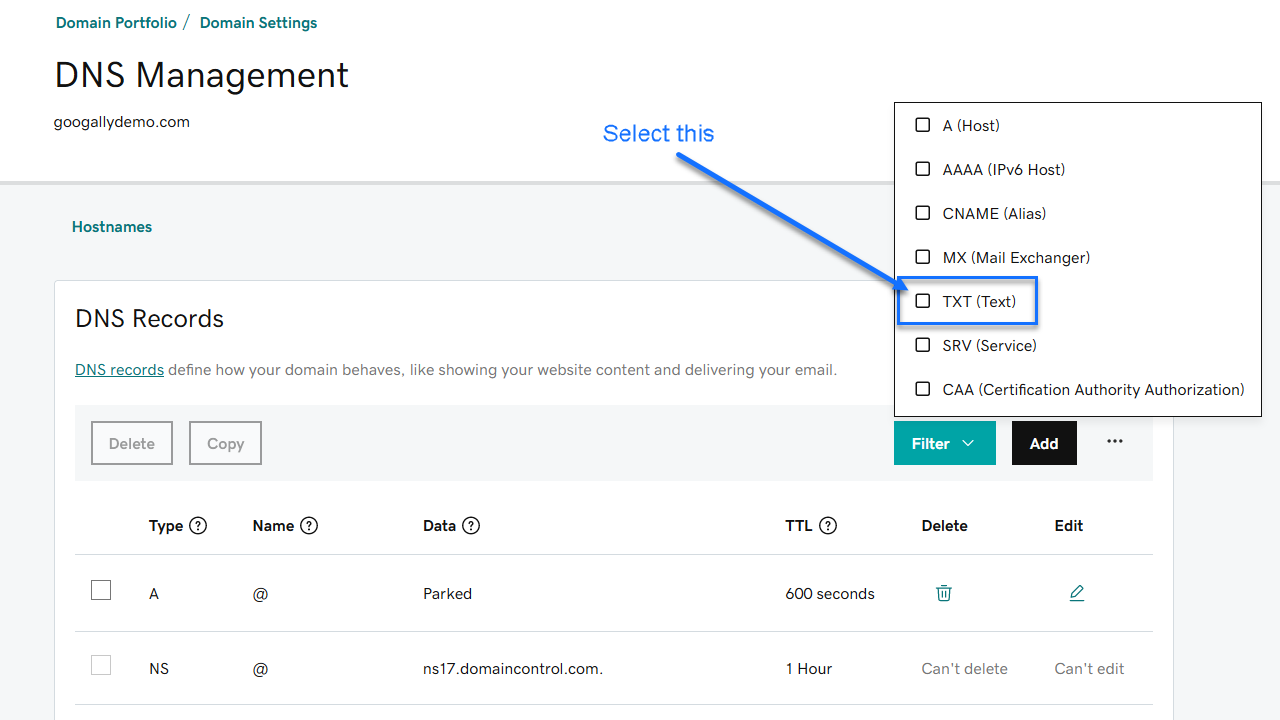
As you can see in the image below, no prior SPF record exists. Click the Add button to add your own Google Workspace SPF record.
The following screen is presented to you to enter your Google Workspace SPF records.
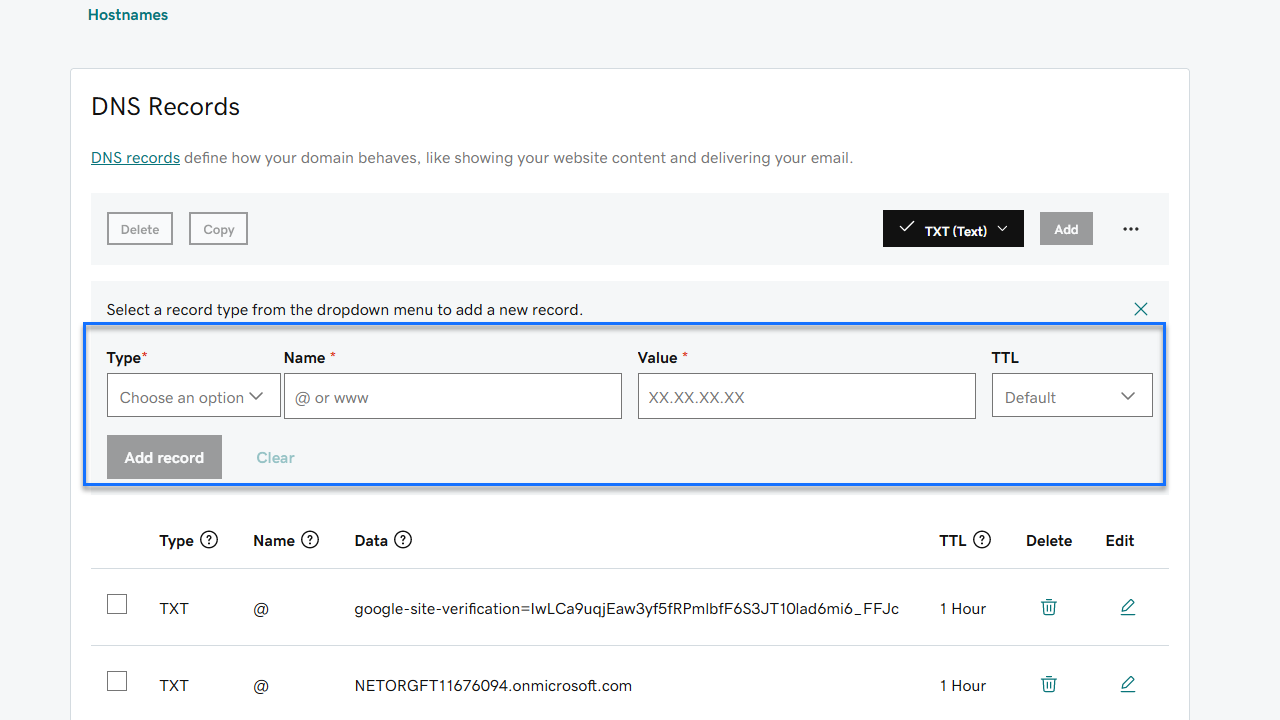
You enter the information in the following manner:
- Type: TXT
- Name: @
- Value: v=spf1 include:_spf.google.com ~all
- TTL: 1 Hour
Then click the “Add record” button.
Your screen should now look like this:

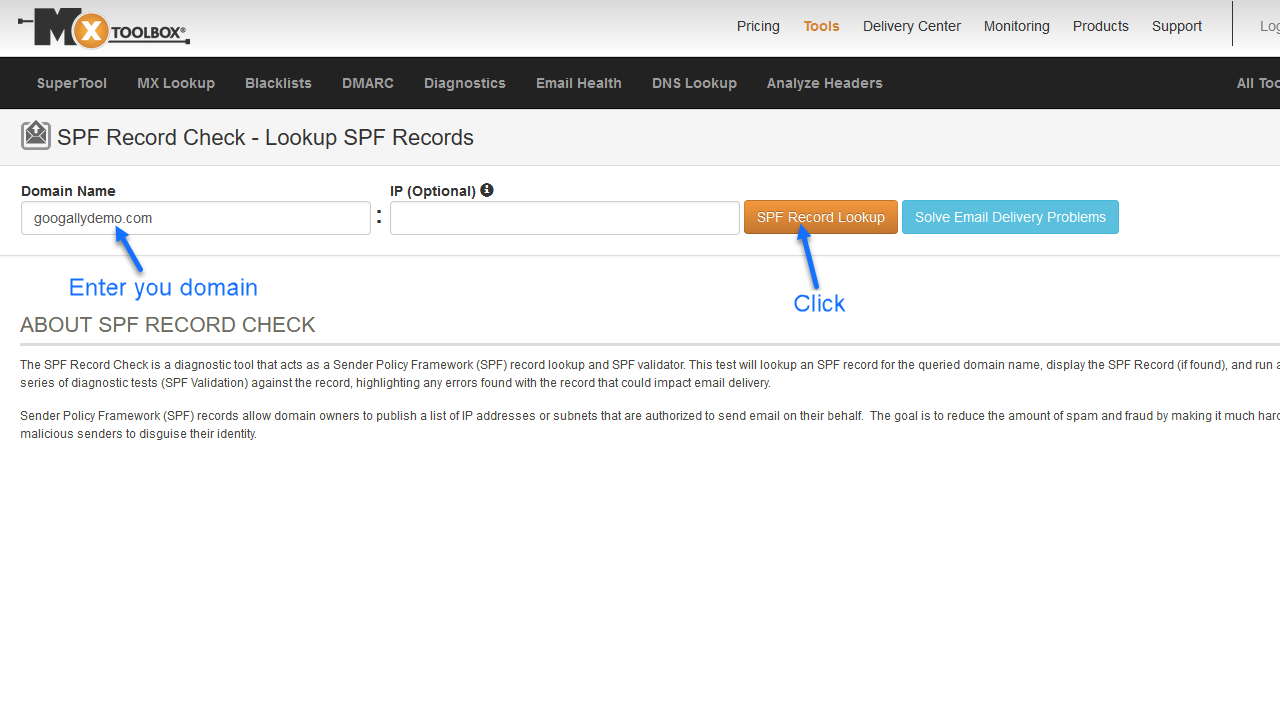
How do you check that your SPF record entries have been saved and propagated?
You can go to this link https://mxtoolbox.com/spf.aspx and check.
Just enter your domain name in the box and click the “SPF Record Lookup” button.
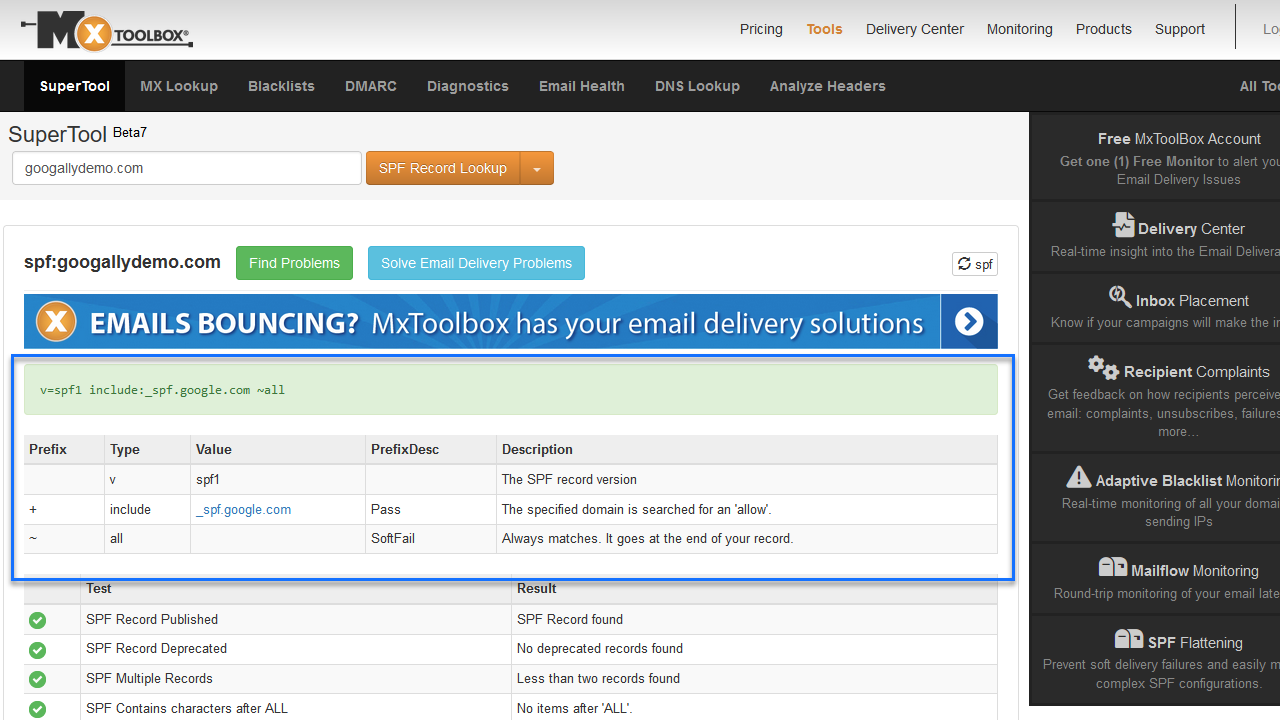
The screen below reflects the recent Google Workspace SPF records update.
Related Posts
Explore Tips and Guides! Discover expert insights and practical guides for optimizing your Google Workspace experience with our informative resources.


.png)
.png)

.png)


.png)
.png)


.png)


.png)


